

Jira is one of the most flexible project management tools out there.
The ability to customize your workflows to perfection is priceless when it comes to web development.
But when you need to work with less technically-savvy people or clients, problems start piling up.
One of them is creating issues in Jira. Something is bound to happen: wrong issue type, missing fields, no attachments… or worse.
So, keeping non-technical people out of Jira makes sense—but then again, transferring emails into Jira is almost a full-time job as well!
Unfortunately, automatically creating a Jira issue when you receive an email is a lot more trouble than it’s worth.
Of course, you can always use a solution like Zapier, create specific email labels and use automation to get all of that sent into Jira.
But there are some things that Zapier simply cannot do:
- It doesn’t support attachments;
- You need to manually label your client emails;
- You only have the Email Subject, Body, and Sender fields to work with. Data to populate advanced issue fields, like Environment info, will have to be pulled some other way;
- You’ll still have to go back to the original email to notify the client about the issue status.
So what’s the alternative?
In this blog post, I’ll show you how to automatically create a Jira issue when you receive feedback, even if the sender isn’t part of your Jira organization.
Completely bypassing e-mail and all the triage that stems from it!
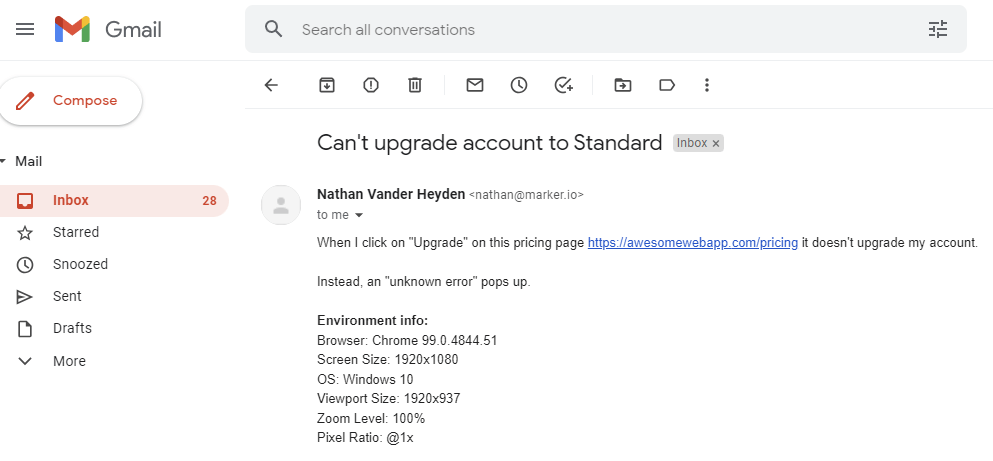
The goal is to go from this…
To this…
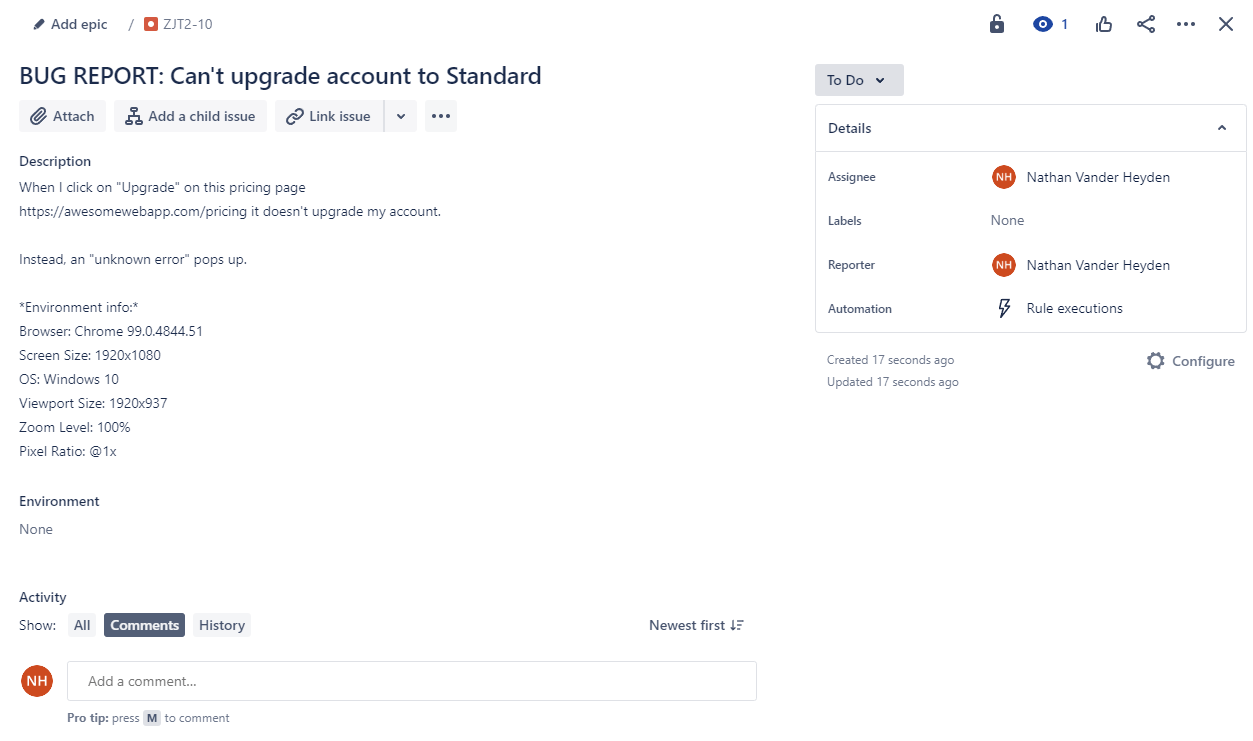
… without any human involvement!
Let’s get to it.
Collect website feedback directly in Jira via Marker.io
The best way to directly send bug reports in Jira is with a visual feedback tool like Marker.io.
With an embedded widget that lives on your website, you get rid of the middleman—the dreaded email—and save time for:
- The client/QA tester, who previously had to write up an email for every single issue;
- The project manager, who no longer needs to live in his inbox to sort bug reports.
1. Install the widget
Installation is super easy: after signing up for Marker.io, you just need to connect your Jira project in one click.
Then, all you’ll have to do is copy and paste a snippet like this one in your HEAD tag:
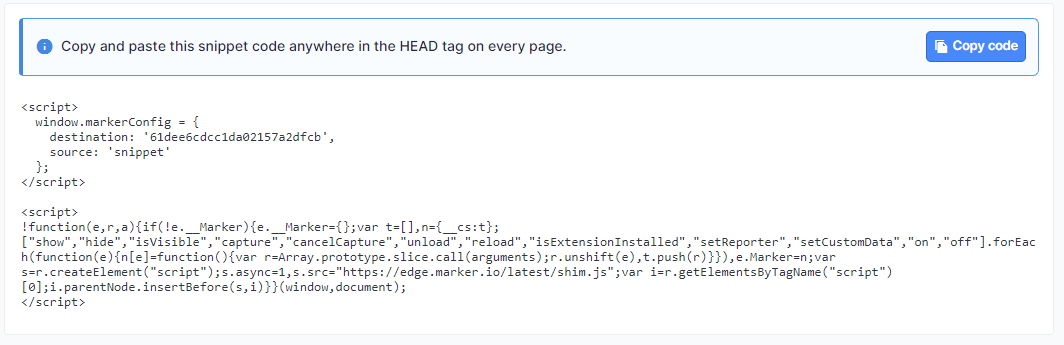
And done! The widget is now live on your site or staging environment.
You can configure it to be visible to only specific users or with a secret URL parameter like /?bug.
2. Collect feedback
With the widget installed, sending feedback and bug reports is child’s play.
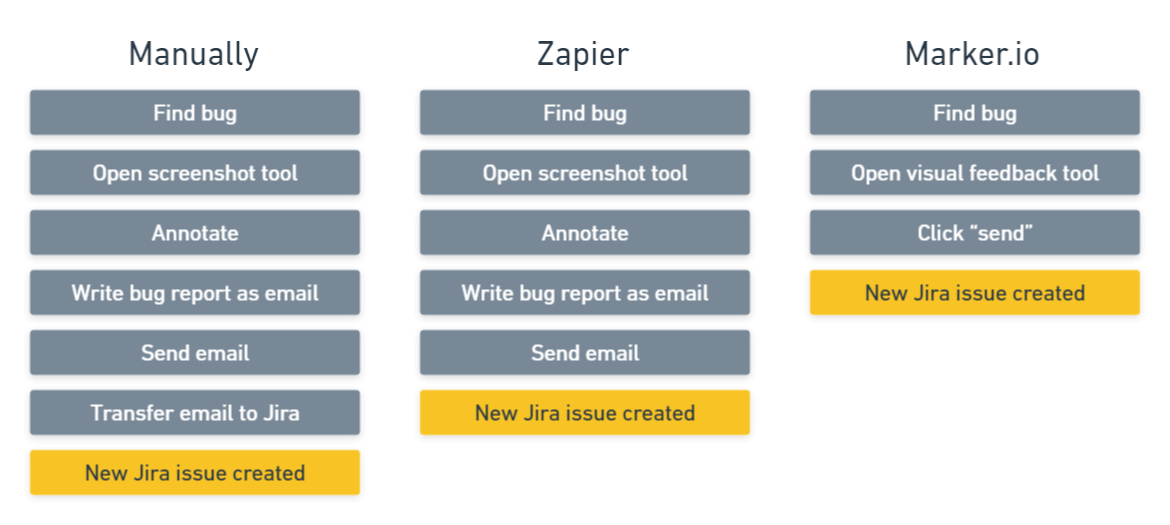
What used to be an unending back-and-forth between annotation tools, email, and Jira becomes a simple 3-steps process:
- Find bug.
- Open visual feedback editor and write report straight in the browser.
- Click send—done.
This is what it looks like in action:
There are a couple of extra benefits that come with using a widget:
- Console logs, network logs, session replay, and environment info are automatically captured with each bug report. This saves developers a ton of time when trying to reproduce a bug.
- Screenshots, annotations, reporter name, and contact info are attached to the issue in Jira.
The best part? Your clients don’t need access to Jira at all.
And if you need to communicate with the reporter about a specific issue, you can do so directly through Marker.io’s client portal:
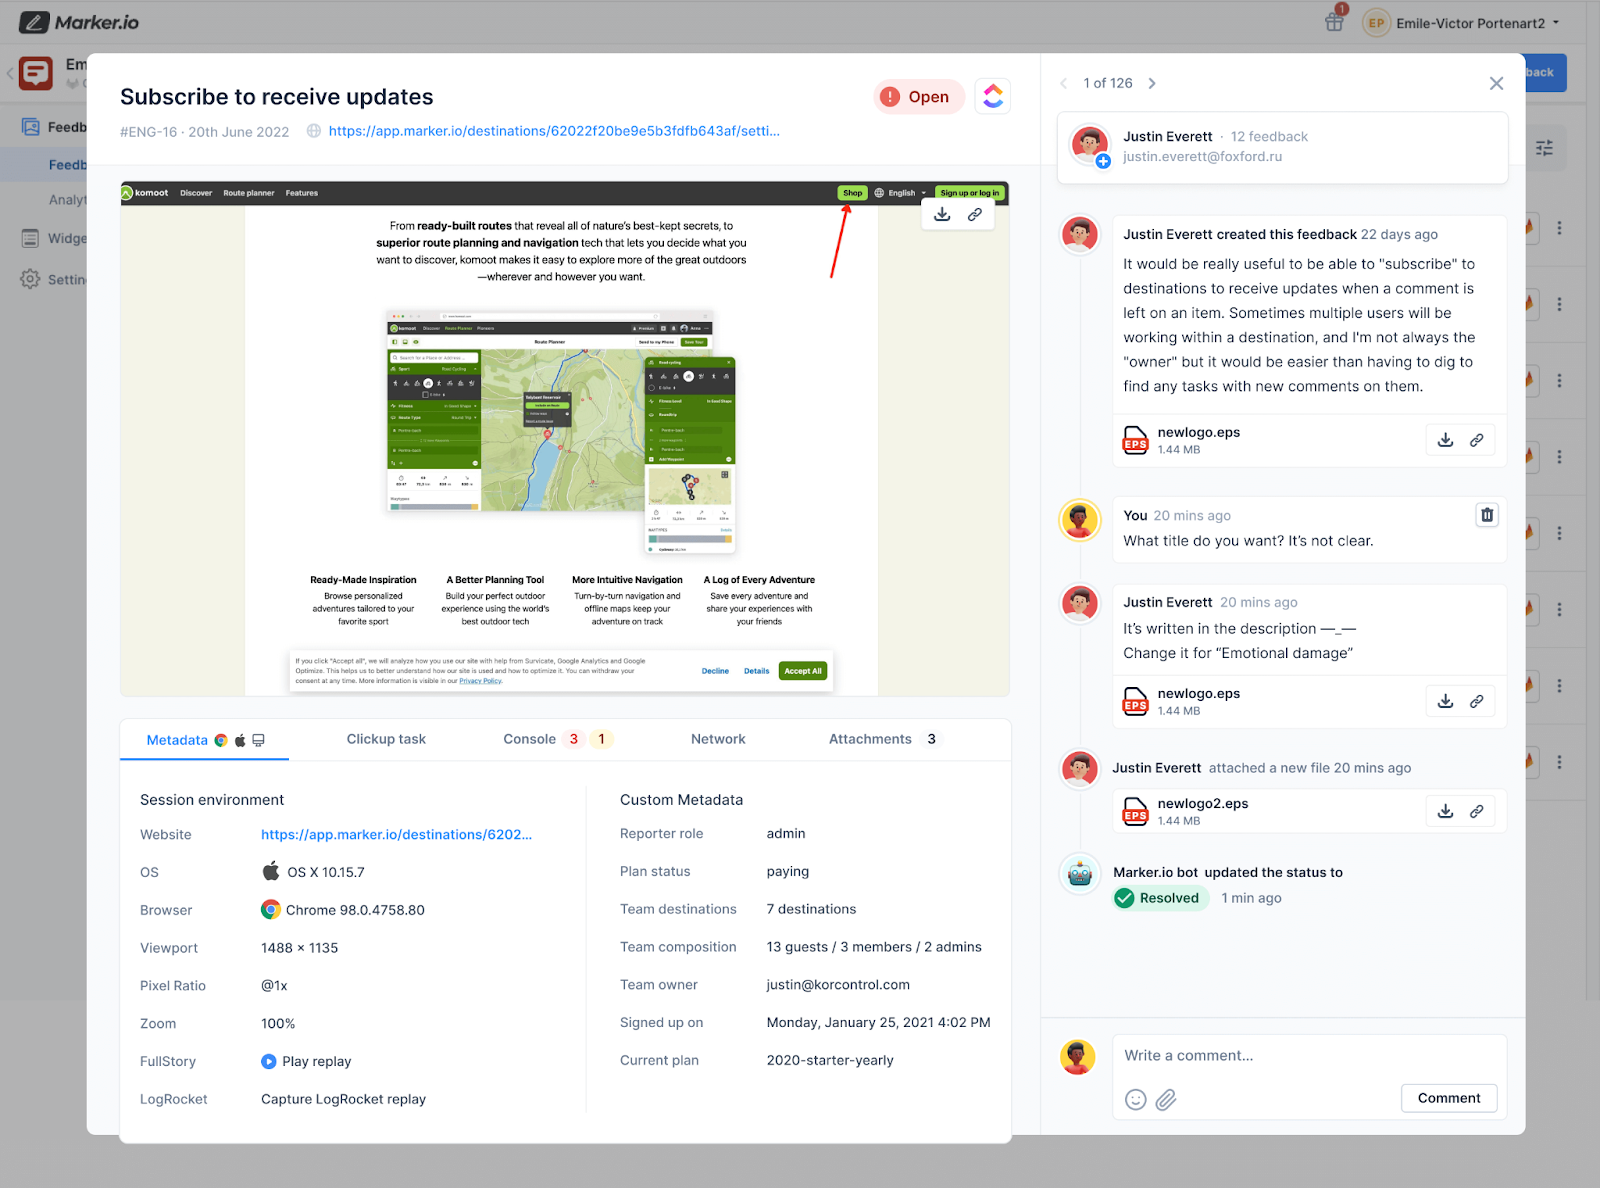
No more messy email chains.
Plus, every comment on the client portal is immediately synced with the issue in Jira. This means your developers never have to leave their PM tool.
Ready to stop transferring every email to Jira? Check out our integration here.
In this blog post, we went over how to automatically create a Jira issue when you receive feedback, even if the sender isn’t part of your Jira organization.
If your organization requires using email for bug reporting and feedback—you can use an automation tool like Zapier.
But if you’re just looking to get your client feedback into Jira and save time on email management, try a visual feedback widget—like Marker.io—instead.
Whichever solution you end up using, we hope this tutorial was useful and greatly simplifies your workflow going forward.
