


Beta testing a website before it goes live is vital. Any issues, from bugs to poor functionality, can drive away visitors.
Beta testing is the last step in the website design and development process before a site goes live.
Remember the last time you had a bad online shopping experience? Maybe the website was slow or hard to navigate.
As a web developer, beta testing helps you prevent these issues on your client's website.
Effective beta testing is about fixing bugs and gathering feedback to improve the design and user experience (UX) before the site launches.
In this post, we'll guide you through seven straightforward steps to implement beta testing and ensure client satisfaction.
What is website beta testing?

After internal quality assurance (QA), a website should be mostly bug-free. But there might be some bugs you've missed, and you need client approval to finish a project. That's where beta testing comes in.
Beta testing involves:
- Providing clients, stakeholders, and sometimes friends, family, and a small group of end-users access to a nearly finished website. These are your "beta testers."
- Identifying and fixing any bugs that weren't found during internal testing (QA/QC) or user acceptance testing (UAT).
- Testing the website for usability challenges or user experience (UX) issues. Can your beta testers navigate the site easily? Does the UX meet user needs?
- Ensuring the website meets business objectives.
- Checking if the site works well on both mobile and desktop.
- Gathering design feedback and other observations from beta testers. This feedback helps make the final design and development changes before the site goes live.
Why beta test a website?
Beta testing a website is crucial to ensure it offers the best UX, speed, and performance. It's also vital for finding and fixing bugs.
A few more reasons:
- Web visitors will leave if a website is poorly designed, hard to navigate, or they encounter bugs/errors
- Consumers prefer brands with user-friendly website designs over brands that feel outdated
- Loading speeds matter. Faster sites perform better and convert more web visitors into customers. We’re talking even milliseconds here!
Beta testing a site or app significantly improves the final product.
Your client should be happier, and you should get approval quicker.
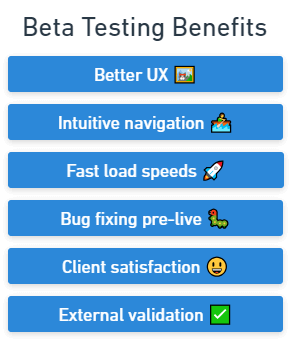
Benefits of beta testing include:
- Bug reports and feedback from a group of users will be used to build the final bug-free version, ensuring it's ready to go live.
- An agency can't just hand off a project to your client and say "Done"—it's their website, and getting it right the first time is nearly impossible. They have specific requirements, and beta testing ensures those needs have been met.
- Beta testing is also useful for validation and confidence for the development team and the client. This way, both parties can be sure the website is ready, as internal QA is never enough. You need external validation and testing before it can go live.
Now, let's look at the steps you need to take for the beta testing process.
How to beta test a website?
After internal testing comes the beta testing phase.
This phase is a crucial part of the development process. It involves clients, stakeholders, and other trusted people with an interest in the project.
Here are the 7 steps for testing the beta version of any website or app in the real world:
- Define testing objectives
- Set up a staging environment
- Collect feedback and bug reports
- Provide clear beta testing guidelines
- Gather testers and share access to the beta site testing environment
- Triage feedback and implement in the product development lifecycle
- Discuss results with the client and implement fixes
1. Define testing objectives
There are many different types of beta testing, depending on what you’re looking to achieve.
Before any beta testing can start, you need to establish testing objectives and goals.
Goals need to be clear, measurable, and aligned with the business objectives connected to the launch of a new website or app.
For example:
- Are you testing for functionality, speed, usability, or performance?
- How will you ensure the core pages and features are working properly, e.g., does the checkout work smoothly under multiple conditions (for eCommerce sites)?
- SaaS websites need a smooth, intuitive UX so that potential customers can easily understand the product and sign up for a trial
- How are you testing for different kinds of connections, e.g., 3G, 5G, Wi-Fi, etc.?
Make sure your beta testers are using the site or app in the same way as your target audience and on the same devices.
However, as it's impossible to know exactly who's going to be visiting this new website, cross-browser and cross-device testing is usually a critical part of beta testing.
This ensures it works across any device, browser, and operating system (OS).
2. Set up a staging environment
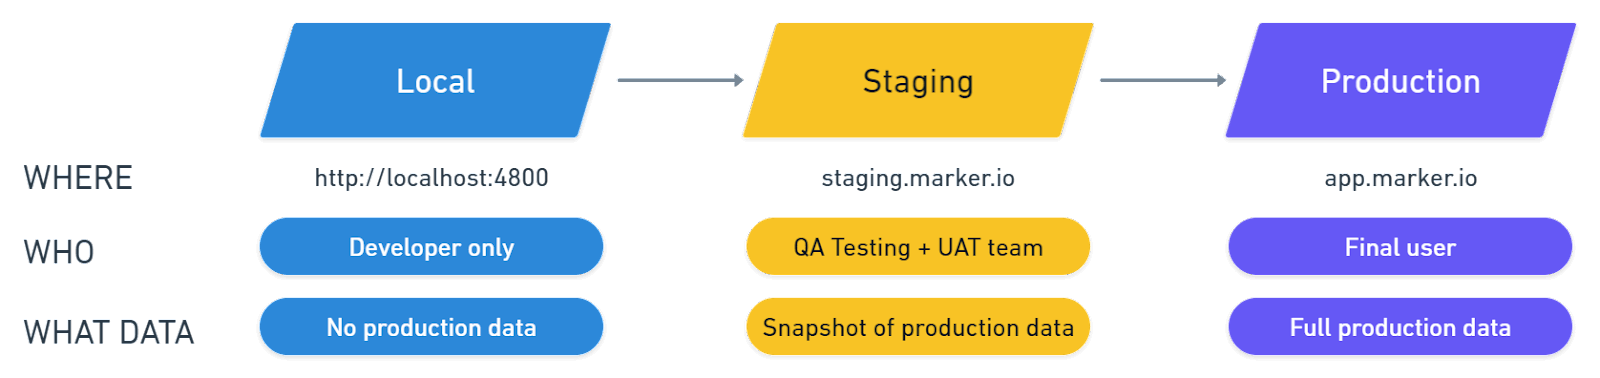
Next, you need to set up a staging environment for beta testing.
This should be an isolated environment that mirrors the production environment, e.g., "staging.yourwebsite.com."
It should be a clone of the production site with a separate database, to prevent data loss or corruption.
Ensure the staging site is:
- Not available to the general public
- Configured with a .htaccess file to prevent search engines from indexing the site
- And password-protected (on all pages).
This is easy enough for developers to set up. If you’re using WordPress or similar CMS platforms, there are plugins and specific apps for this.
Using a staging environment is the best way to gather feedback without disrupting everything your agency has worked hard to build for your client.
3. Collect feedback and bug reports
For any kind of beta testing, you need a system or tool that makes it easy to collect feedback and bug reports and action them.
That's where Marker.io comes in.
Marker.io is a powerful bug reporting and website feedback tool for web development agencies and project managers.
It's ideal for website beta testing as this is the time when you need to fix bugs and other issues before a site goes live. With Marker.io, you can:
- Gather comprehensive bug reports, with automatic environment and record logs capture.
- Receive visual feedback, including screenshots and annotations.
- Ensure every bug report is automatically synced with your project management tool of choice (e.g., Jira, GitHub, Trello, Asana, and others).
- Use our session replay tool to see what a user was doing before they sent a report.
- Analyze network requests logs as if you were looking at the tester’s dev tools.
Marker.io is a one-click bug reporting tool that works as a widget or plugin on any staging or live website and app.
For your clients, reporting a bug is a simple, 3-steps process:
- Click the button when they’ve found a bug.
- Fill out the feedback form and input details.
- Click on “Report Feedback”—done!
Everything reported through the Marker.io widget will go straight into your project management tool of choice (Jira, Trello, Linear…).
It saves a lot of time compared to receiving fragmented pieces of feedback via email, Slack, Zoom calls, and other channels.
Save hours on bug tracking, beta tester, client, and user feedback—try Marker.io for free today.
Pricing: starts at $39/mo.
4. Provide clear beta testing guidelines
Before you let beta users test a staging version of a new website, make sure there are clear guidelines.
Having a bug reporting and feedback tool is incredibly helpful as this ensures everything flows into your project management suite and feedback doesn't overload inboxes.
It’s also useful to have a bug report template, or you can use a tool like Marker.io that comes with built-in / customized templates.
As part of your beta testing guidelines (that you can use again for different projects), ensure clients know the difference between a bug and a design feedback.
Bugs are errors, design feedback is a client’s point of view and a question of taste, and not necessarily something that’s broken.
For example, a client might not like an image used so that you can source a new one. Or the color might be wrong on certain pages and needs to be changed to fit the brand guidelines.
However, in other cases, it’s a real functionality problem.
Functionality and features impact the user experience, and the aim of beta testers using a site is to see how well (or not) it will perform with target users.
Whether a beta tester is giving a bug report (because of glitches), design, or functionality feedback, ask for them to be specific. As we covered in this article on how to give helpful feedback, this isn’t specific enough:
“This font doesn’t work.”
On the other hand, this is useful feedback:
“This font is too small. Use the style guide we provided and blue for links.”
Make sure your testers know the difference!
5. Gather testers and share access to the beta site testing environment
With everything set up, guidelines, and tools in place, it’s time to gather your beta testers.
In a closed-testing scenario, these should be the most important stakeholders, such as the client and as many of their team as possible.
Aim to pull together a diverse beta testing pool: actual end-users if possible, tech-savvy, non-tech-savvy, etc.
Giving actual users early access is the most effective way to know the features, functionality, and design work as intended for the target audience.
6. Triage feedback and implement in the product development lifecycle
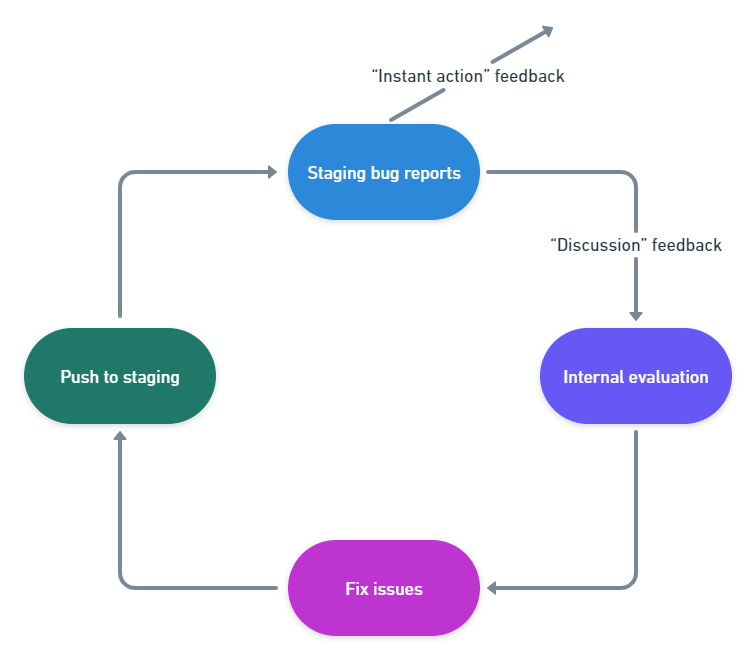
Now you’ve collected the feedback from beta testers, it needs to be triaged and implemented.
Here’s the easiest way to do this:
- Create two categories: “instant action” feedback that can be immediately actioned (e.g., typos), and more complex feedback goes back to the dev team for internal evaluation.
- Prioritize issues based on severity/impact (e.g., high/medium/low…)
- Organize feedback into subcategories (e.g., breaking bugs, feature requests, enhancements, etc.)
- Let the testers know their issues are being looked into, either through email or automatically via Marker.io's 2-way sync with your project management tool.
7. Discuss results with the client and implement fixes
Now you’re clear on what needs doing, you can implement fixes, and discuss results with the client.
The beta testing phase often introduces a lot of unforeseen work, so that is something you should budget for in advance.
But if you find that some of the changes are out-of-scope, you may need to ask the client for an increased budget to do the work.
The final stage is implementation. Deliver any changes, new features, and other functionality as best as you can. Document everything. Work through them in the order of priority.
Ensure anything new either fits within the original testing objectives and overall scope, and then reschedule further beta testing if necessary.
So there you have it: the steps web development agencies need to take to implement beta testing successfully.
We hope this post helps you implement, improve, and optimize your beta testing.
Got any more tips? Let us know via e-mail or on Twitter!
